
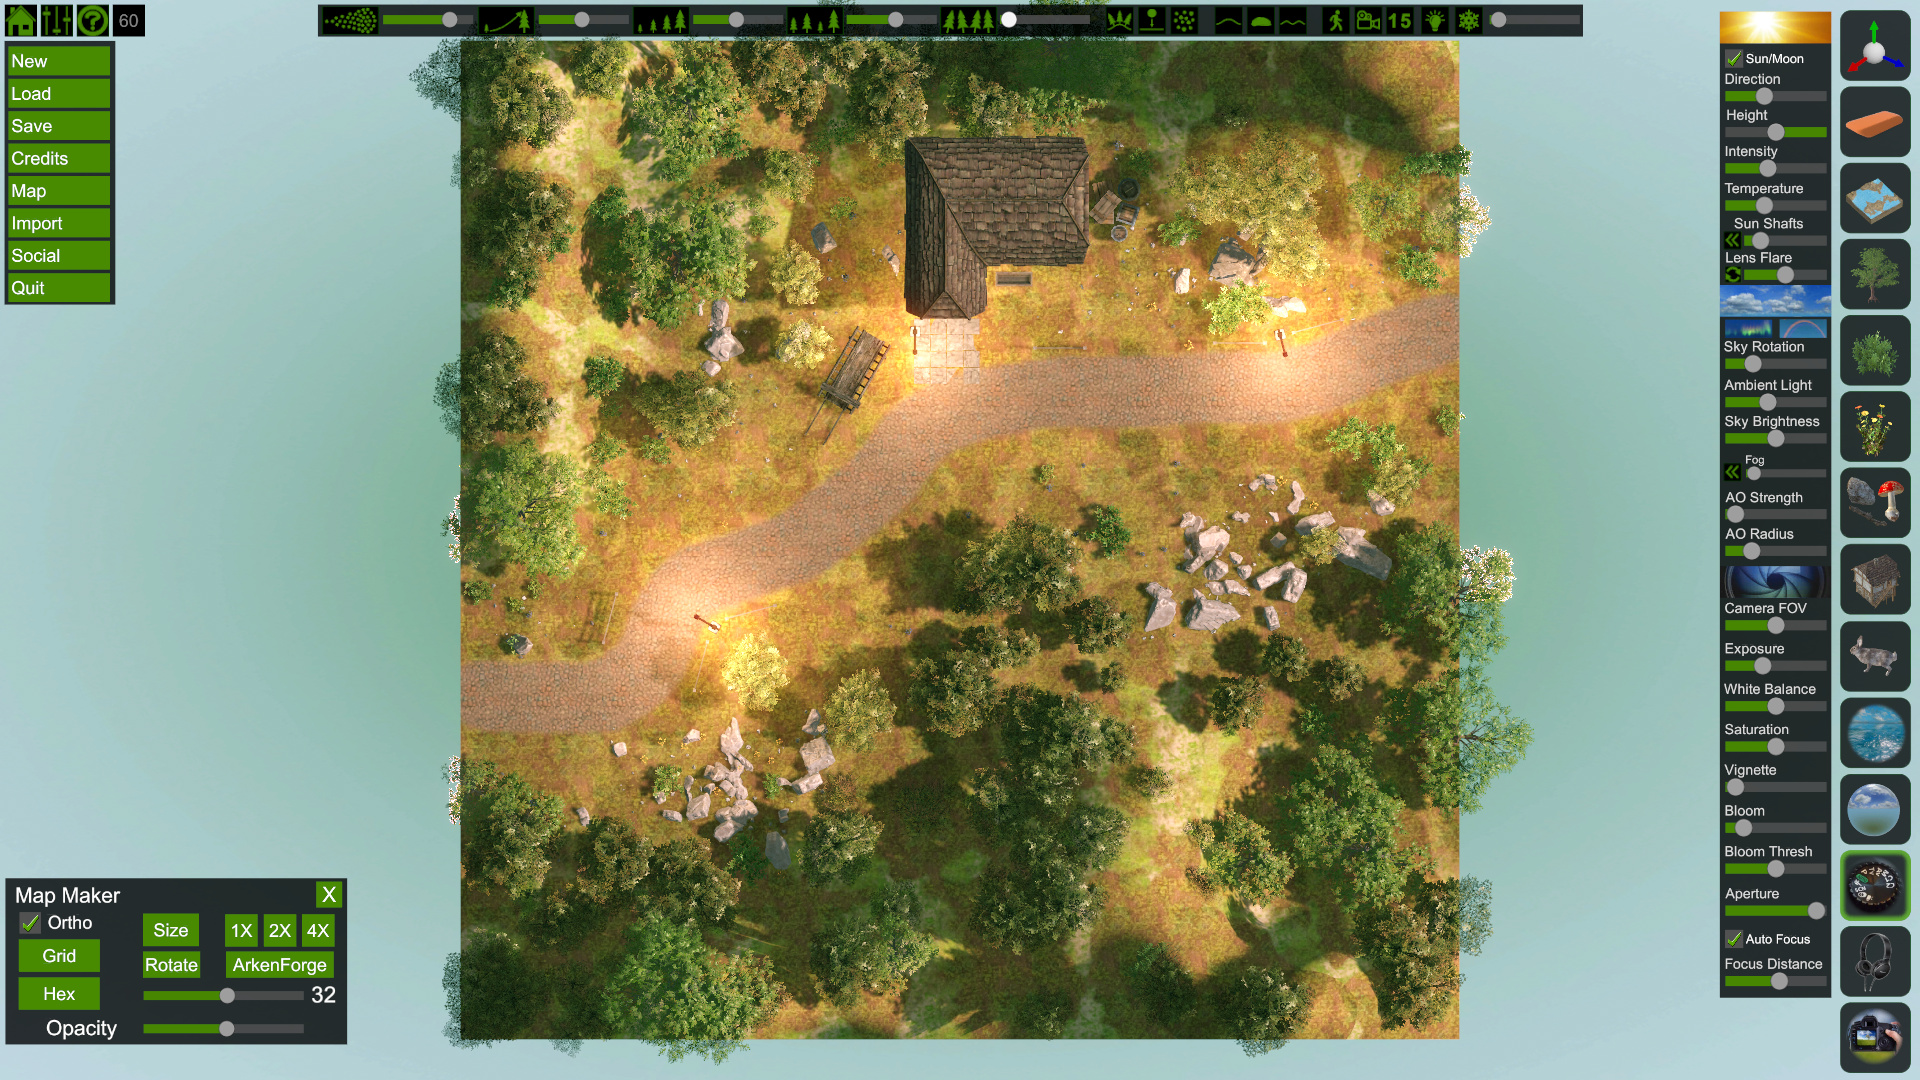
Wanted to share my process for using FlowScape to quickly create 3D outdoor maps grid & hex maps. I developed this process through trial and error, I’ve also used FS for a handful of other projects which has certainly given me a bit more experience with the software.
First off, I’m going to assume you have some familiarity with FS in terms of camera controls, how to place objects, and UI control. If you’re not familiar with the basics I’d encourage you to watch some of the tutorials provided by the dev’s, or find some on YouTube. Overall if you follow this tutorial you really shouldn’t even need to move the camera or resize objects thanks to how we will set up the terrain scaling, but it’s still good to know those basics. I generally learned what I know from just messing with the software, it’s pretty fun but FS is definitely not perfect (keep in mind this is still beta stage software). Won’t be getting into nitpicking the software specifically, I do have problems with it, but the focus here is how I currently use FS.
Second, some of you might ask yourselves, wouldn’t the map we’re using as a reference work just as good as the FS version? Yes! It totally would - recreating the reference map in FS is completely complimentary. I kind of think of it as the digital equivalent of using miniature dungeon dressing pieces for tabletop games, not required at all but some find it really helpful for various reasons, usually to build immersion. These 3D maps are also great for virtual tabletops.
So, with that, let’s get into it! I’m gunna smash through these steps so feel free to ask any questions in your reply.
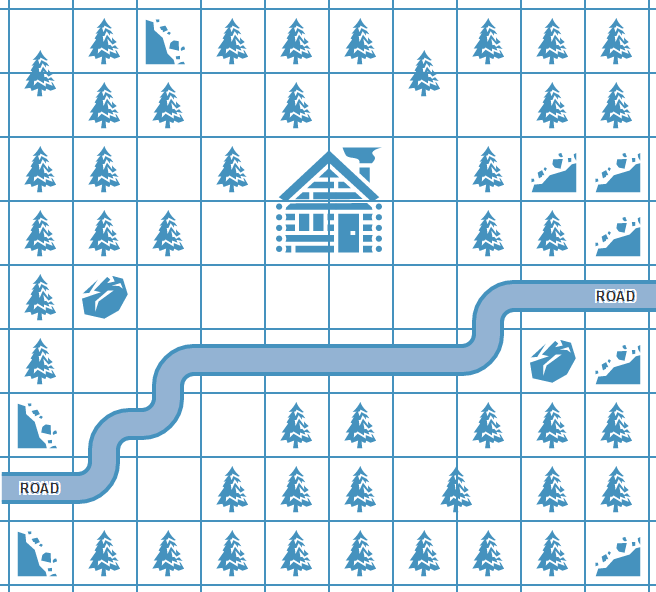
1. REFERENCE MAP
I usually will draw a map very quickly to get an idea of important set pieces, for this example we’ll be creating a small scene of a road leading to an inn, where the PC’s will have a roleplay-to-combat encounter outside of the inn. I went ahead and made a digital reference for this tutorial:
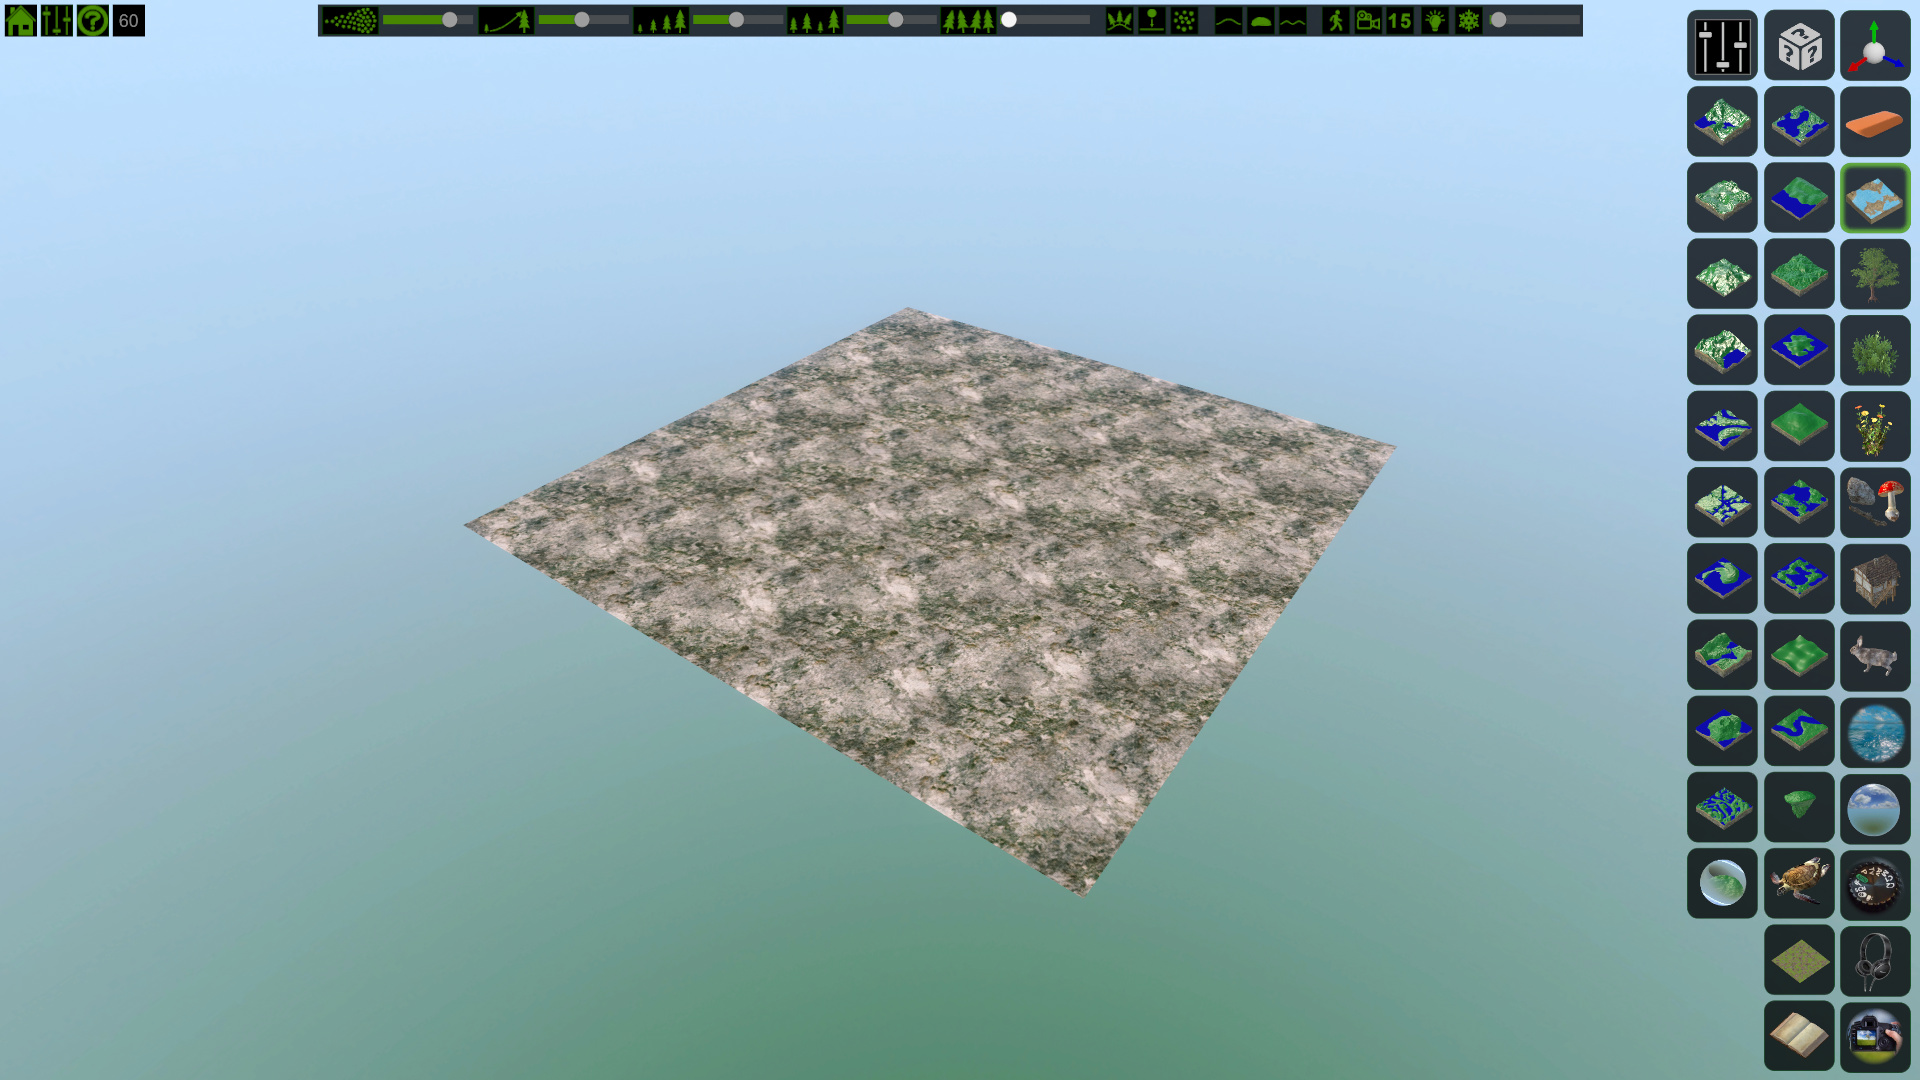
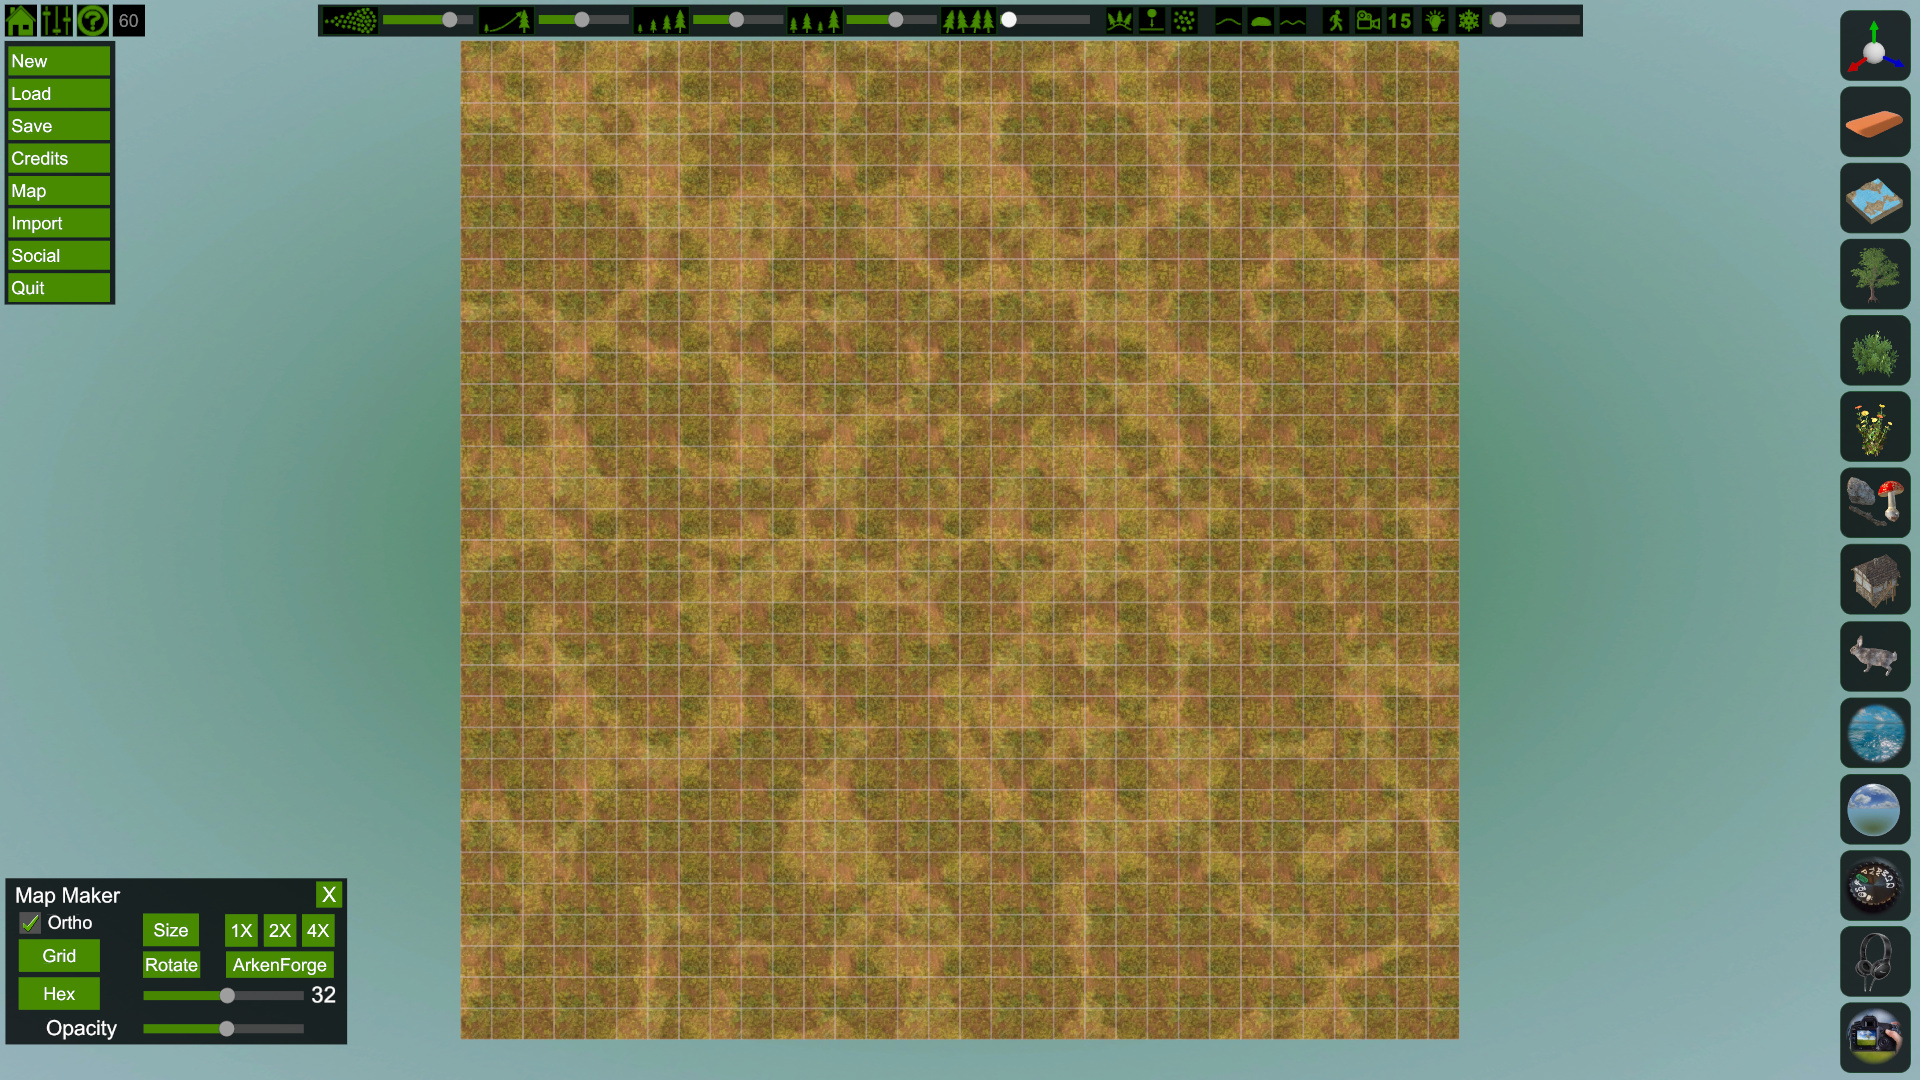
2. STARTING FLAT
Let’s launch FS and let it generate a new random map. I then clear all the plants and select a completely flat ground template. We’ll be adding more terrain depth later.
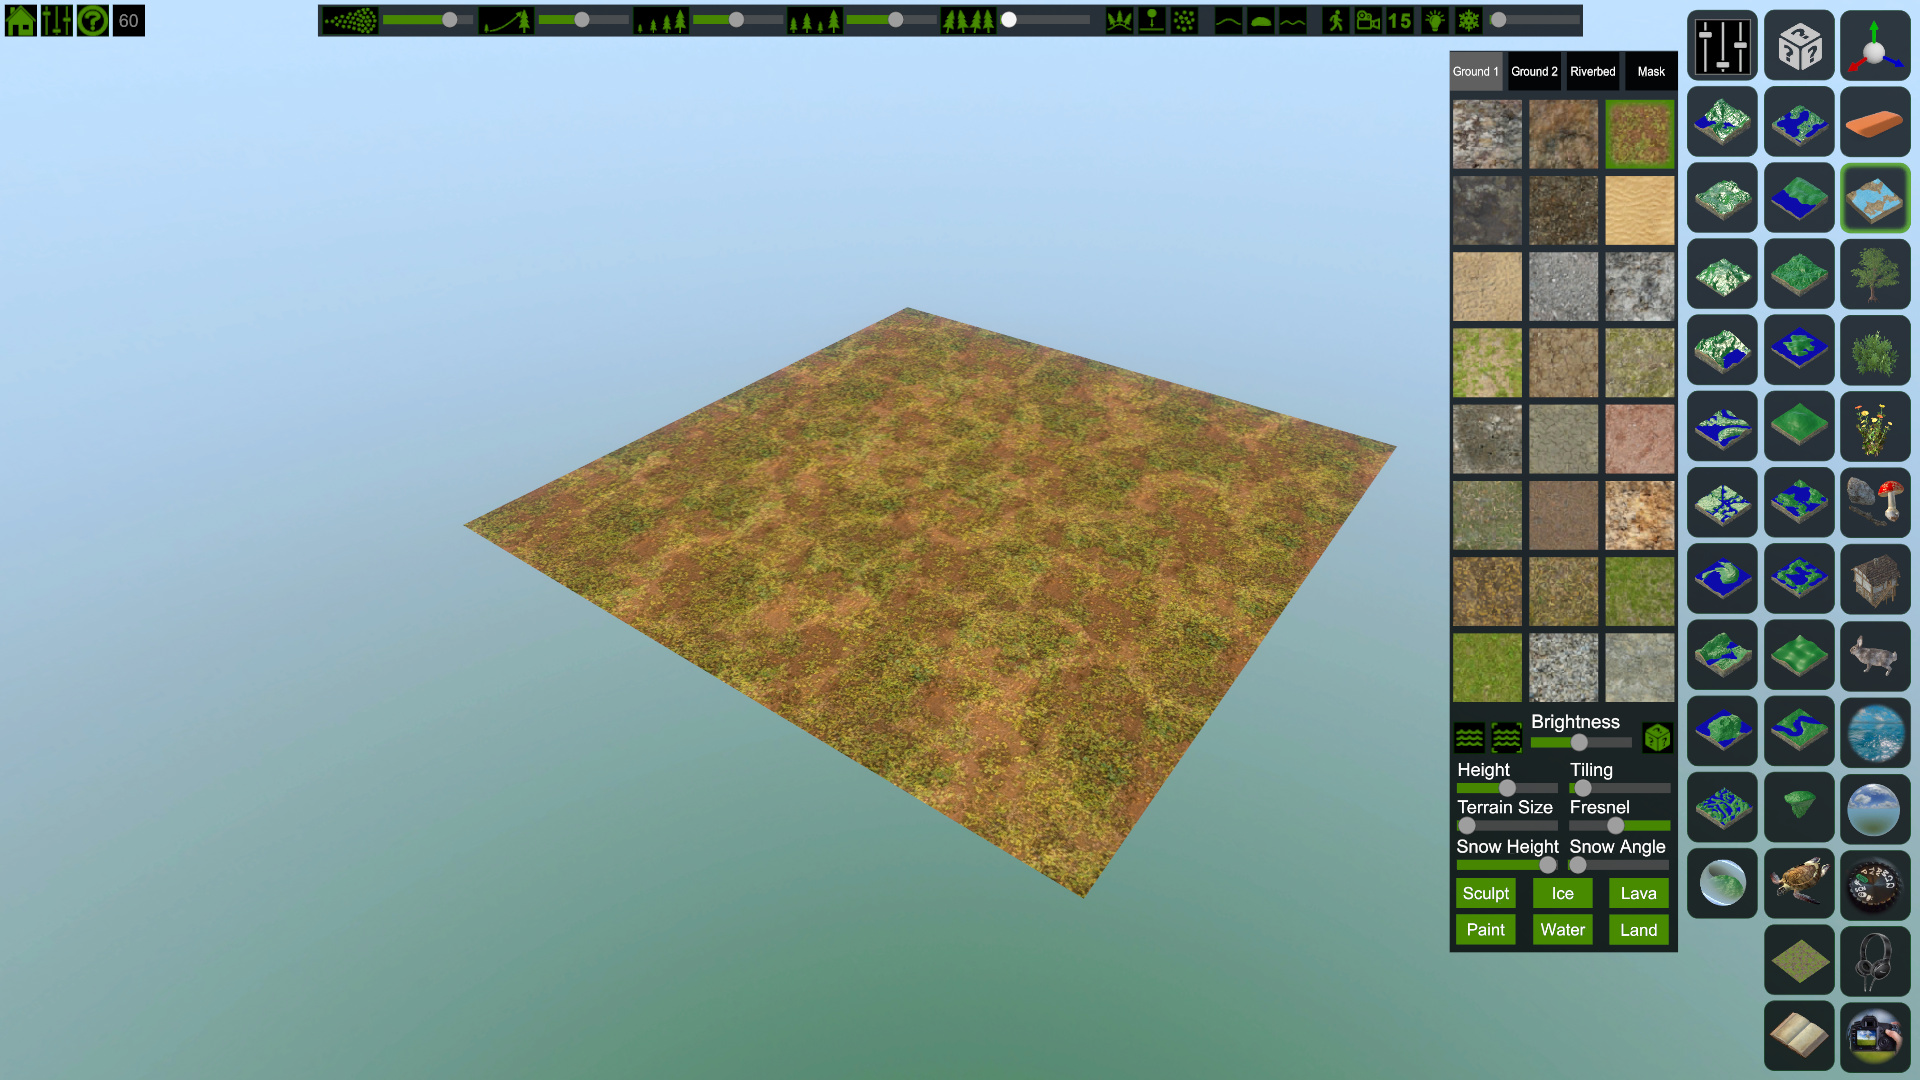
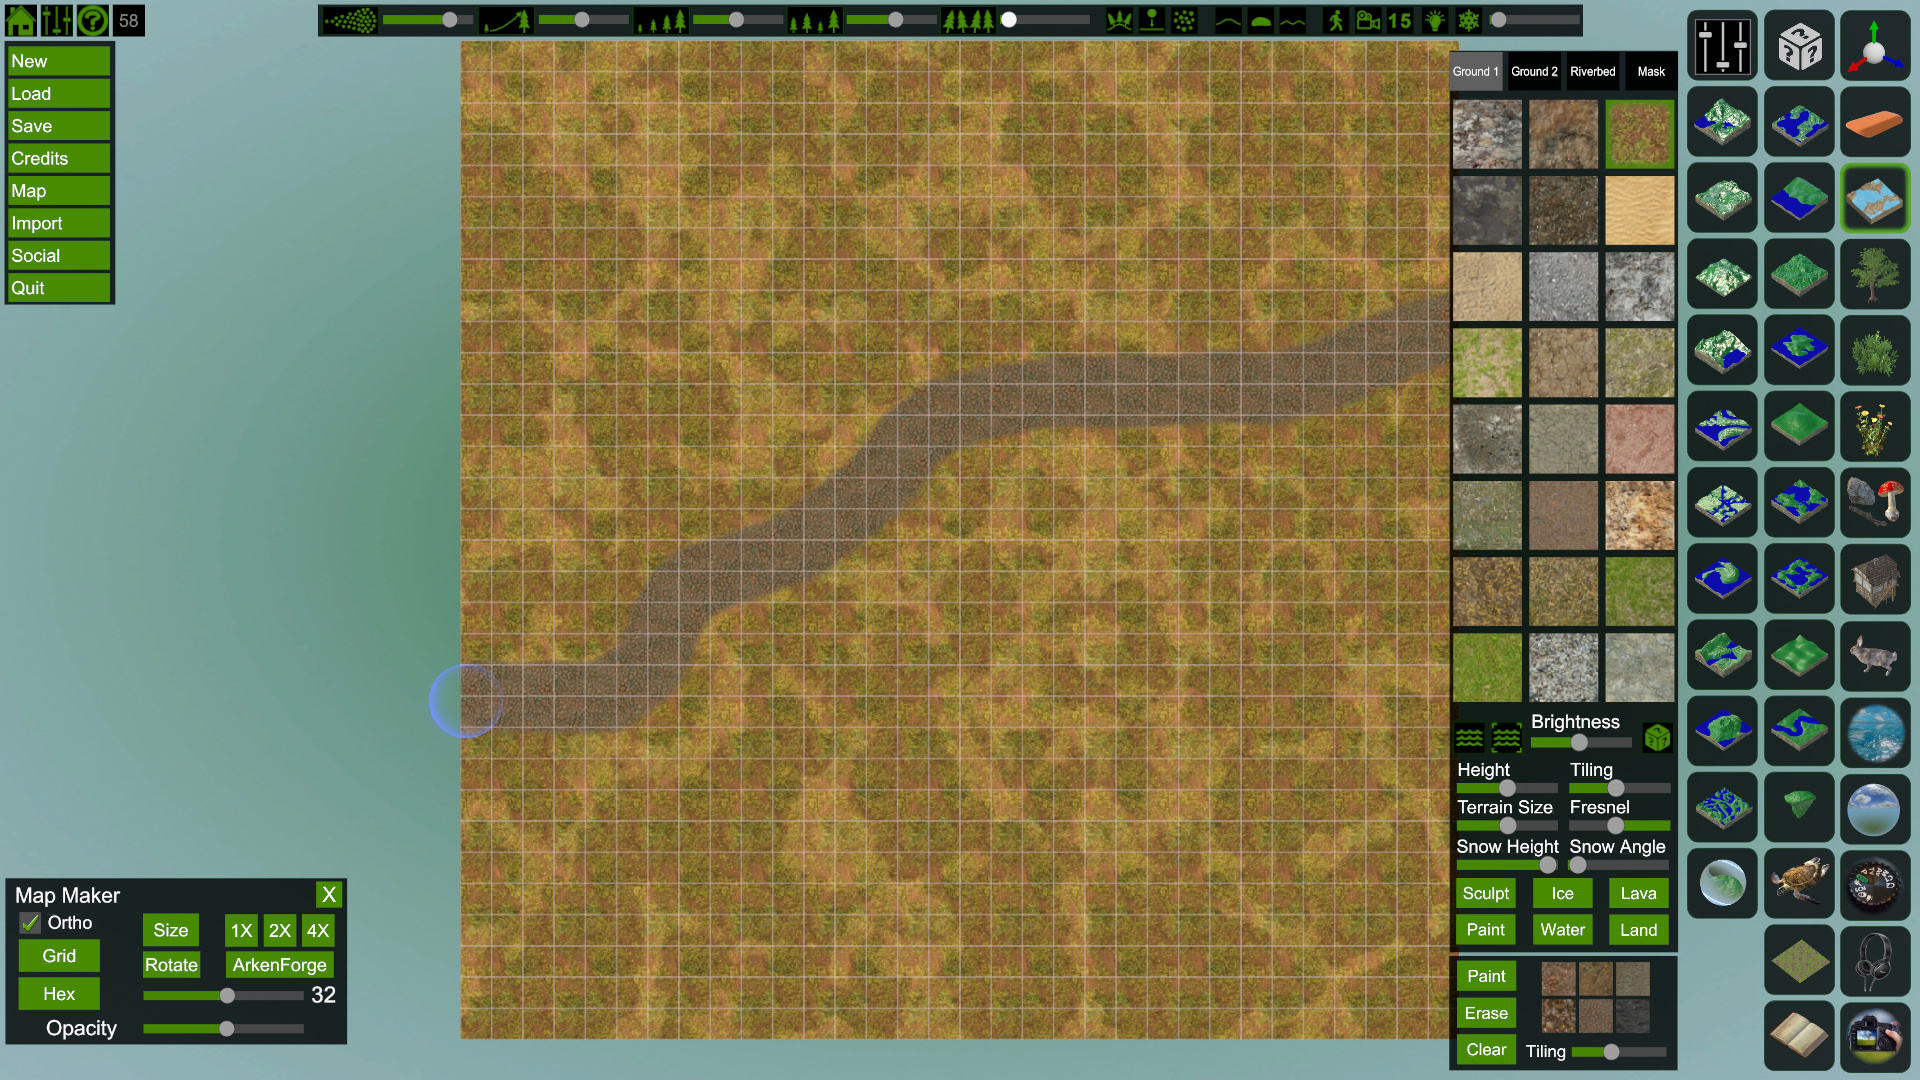
3. ADJUSTING TEXTURES
We want some a nice grass / dirt combo for our floor, so let’s select our preferred textures in this order: Mask, Riverbed, Ground 2, Ground 1. Going in reverse helps IMO as the mask is arguably the most important, and since we’re using the flat ground template, Riverbed is going to be our most dominant layer (don’t ask why FS does this).
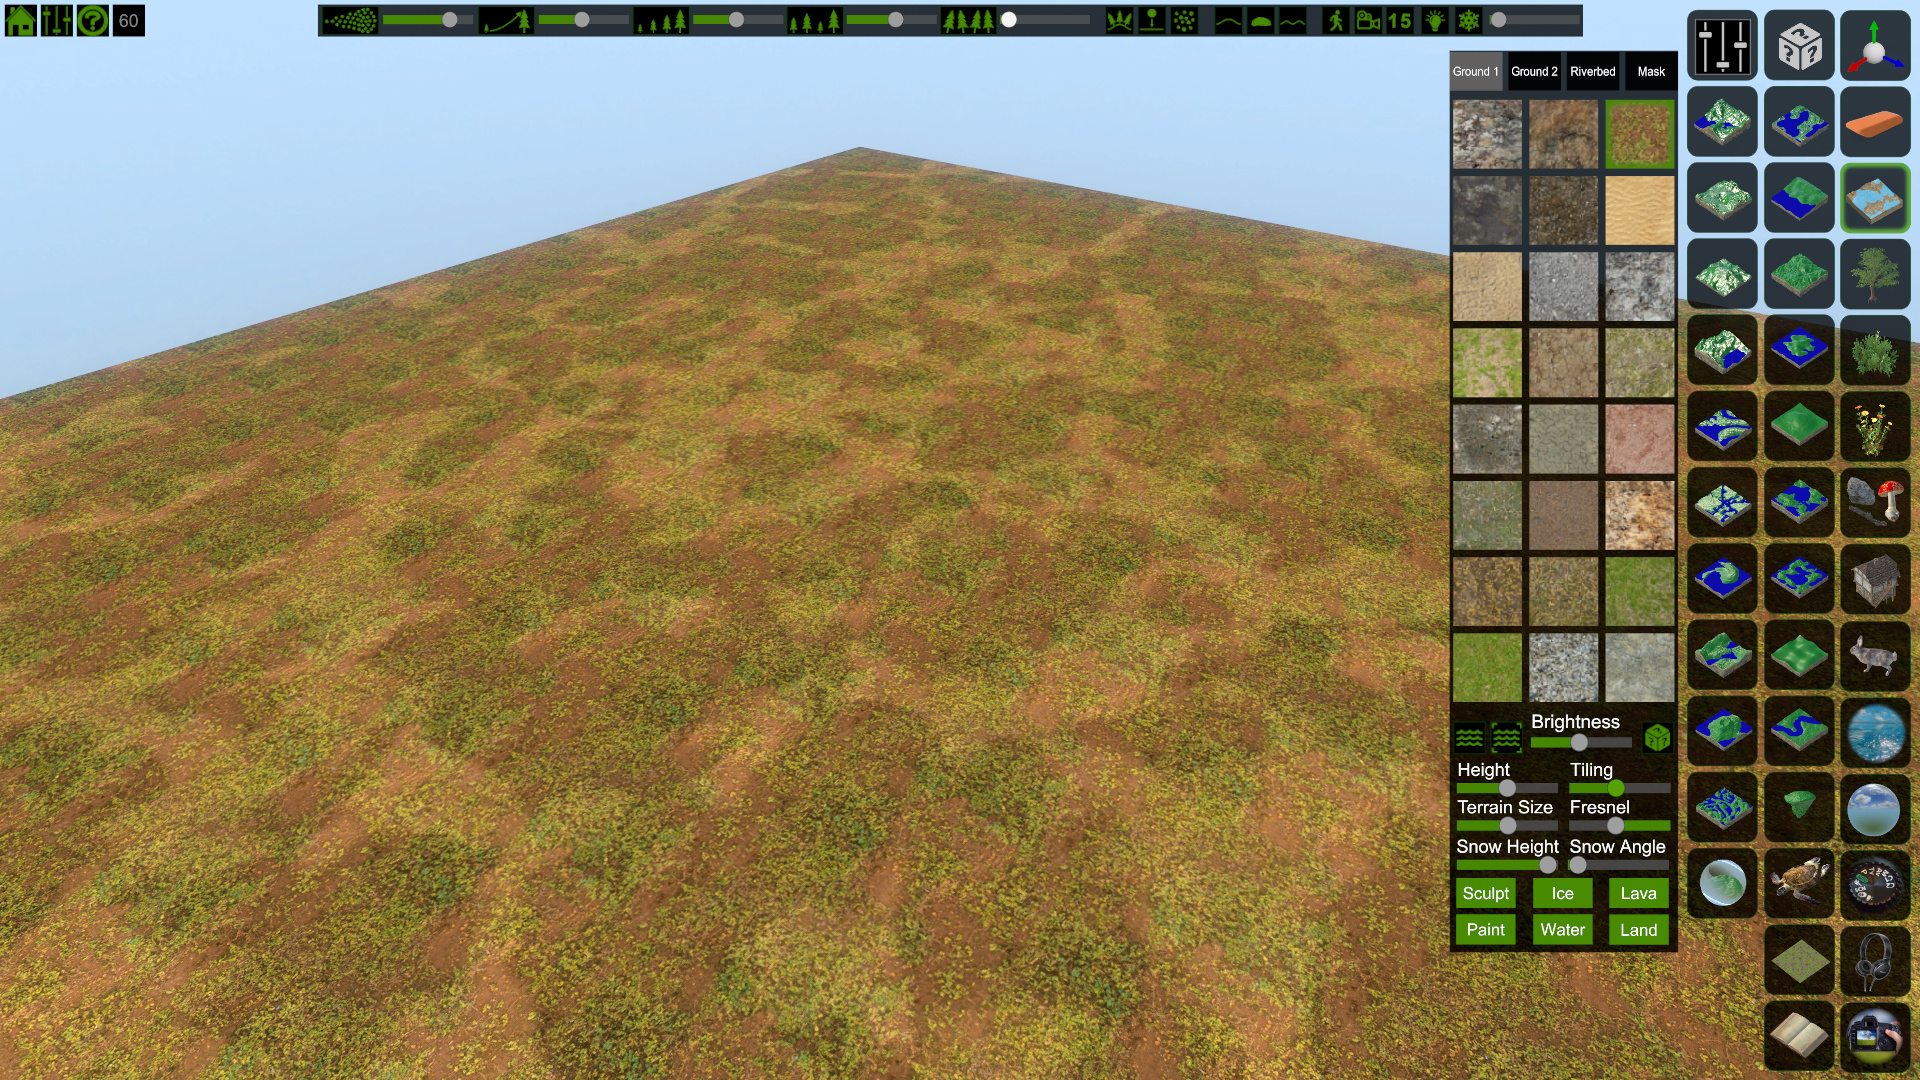
4. ADJUSTING MAP SIZE & TILING
I then adjust the Terrain Size & Tiling sliders to about half way, this is just generally what I start, as most of the objects / buildings default size seem to match with this terrain size. You can really play with sizing to create all kinds of different effects but we’ll focus on getting this map done; these settings are the sweet spot that I’ve found.
5. SETTING UP THE GRID
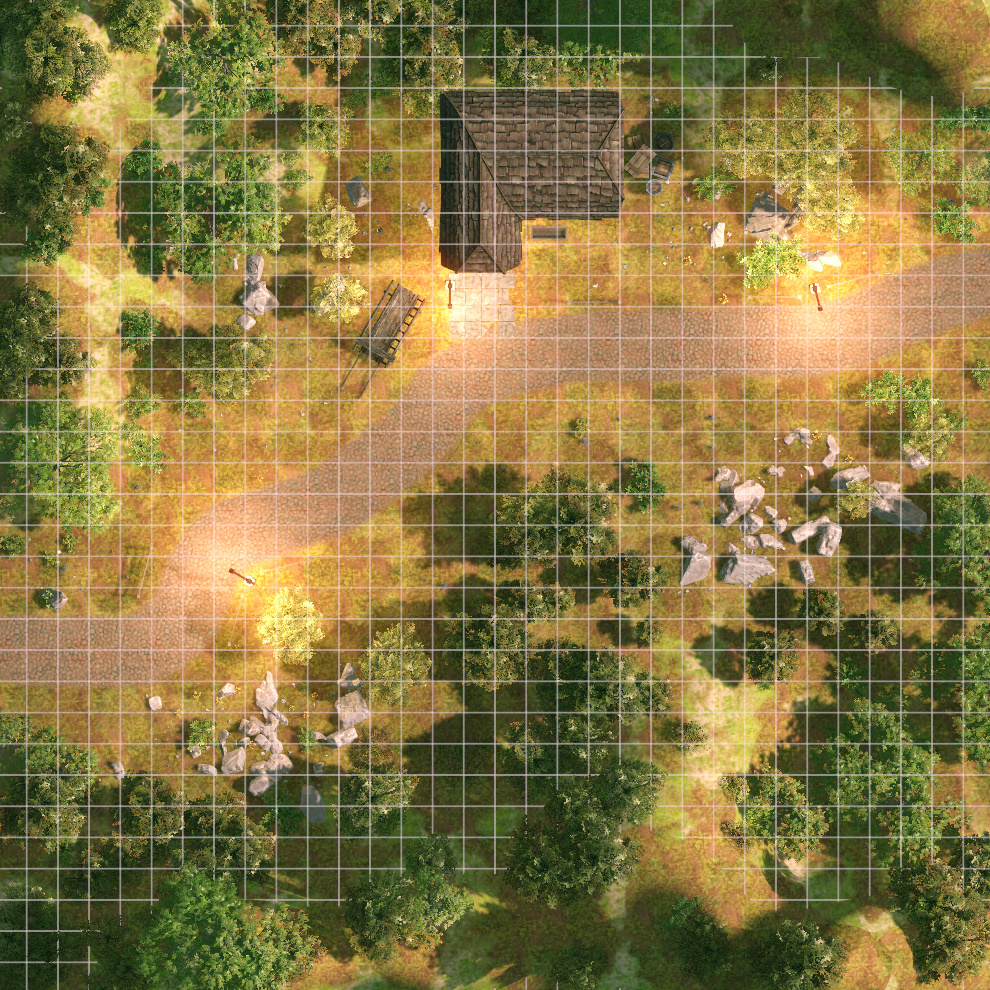
Enter Map mode using Ortho, and apply a grid (I usually use 32 as a default grid size, half opacity). FS allows both grid and hex, but we’ll be using grid here.
6. APPLYING ROADS (OR ANY OTHER ADDITIONAL TEXTURES)
Using the Paint tool, add your road textures or any other textures (lets just stick with roads for this example). I also adjust the Tiling slider in the Paint section to about half way.
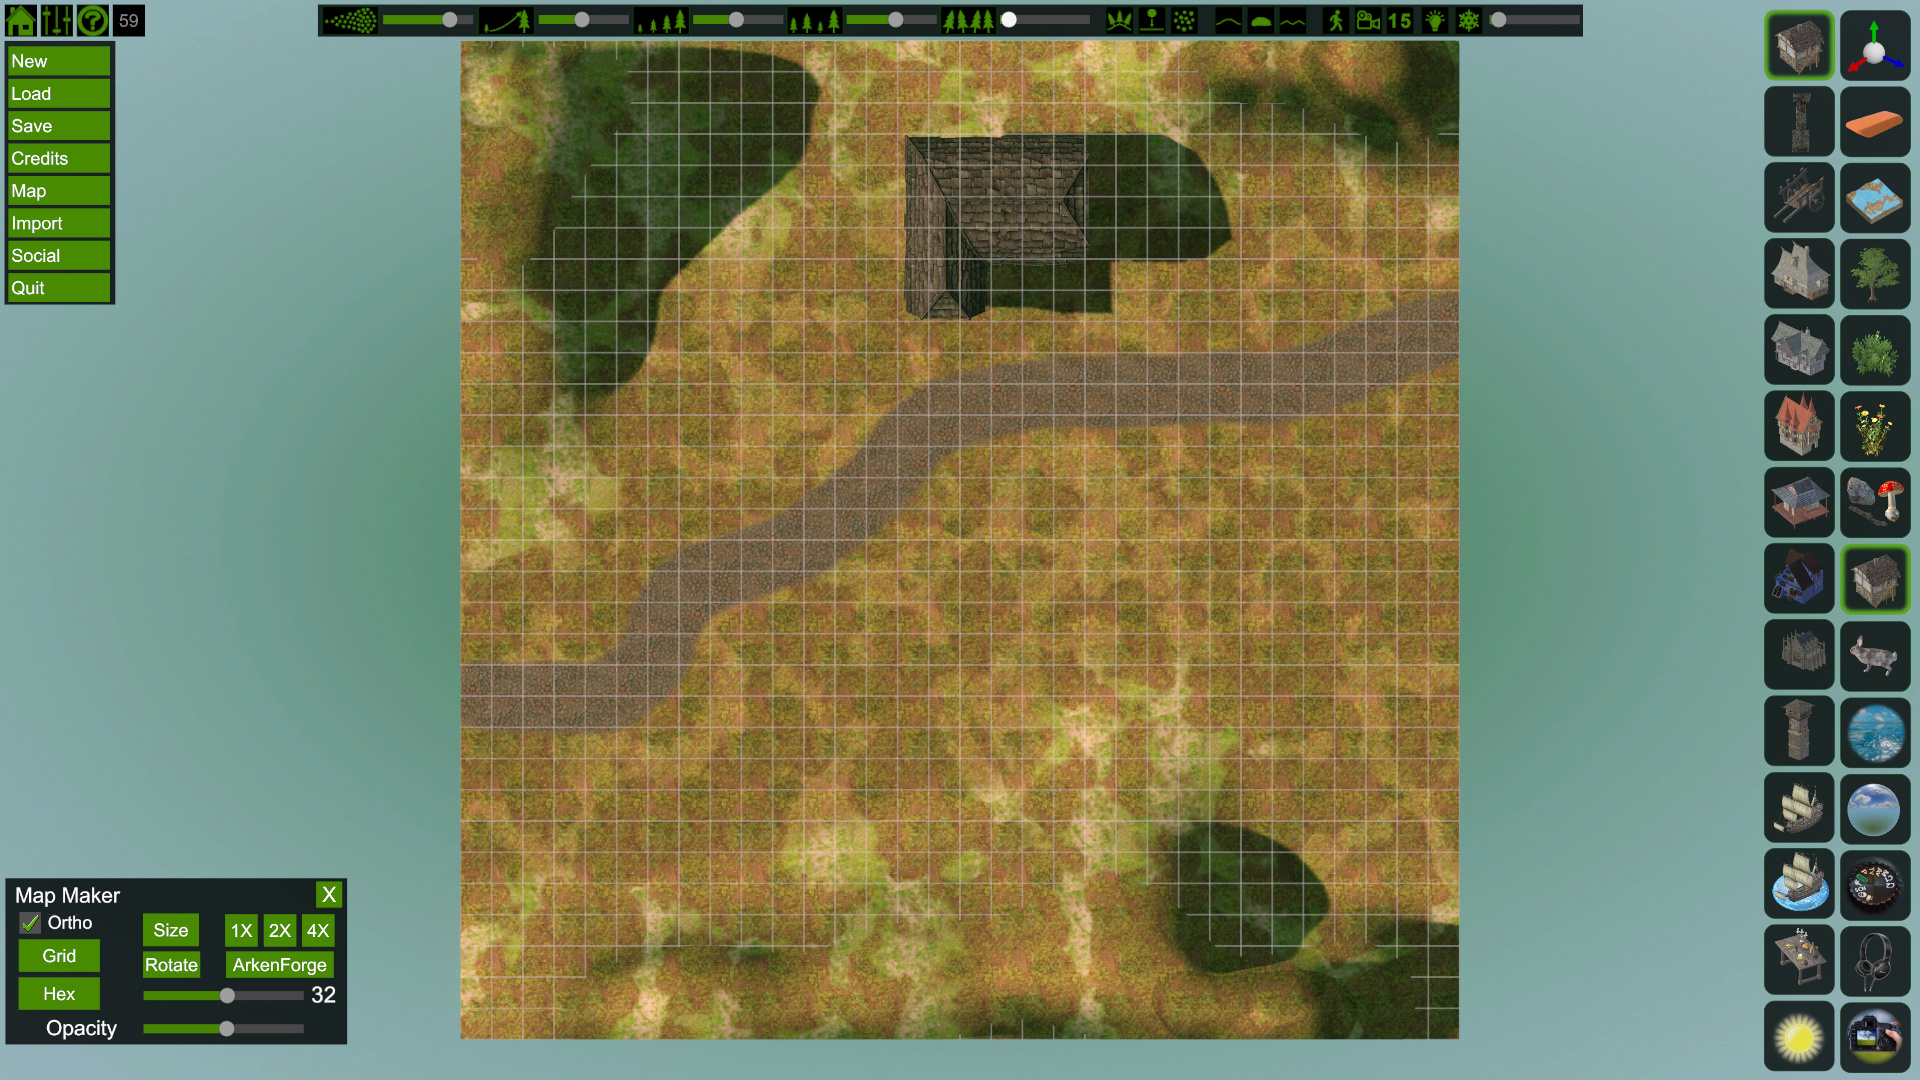
7. ADDING IMPORTANT TERRAIN & OBJECTS
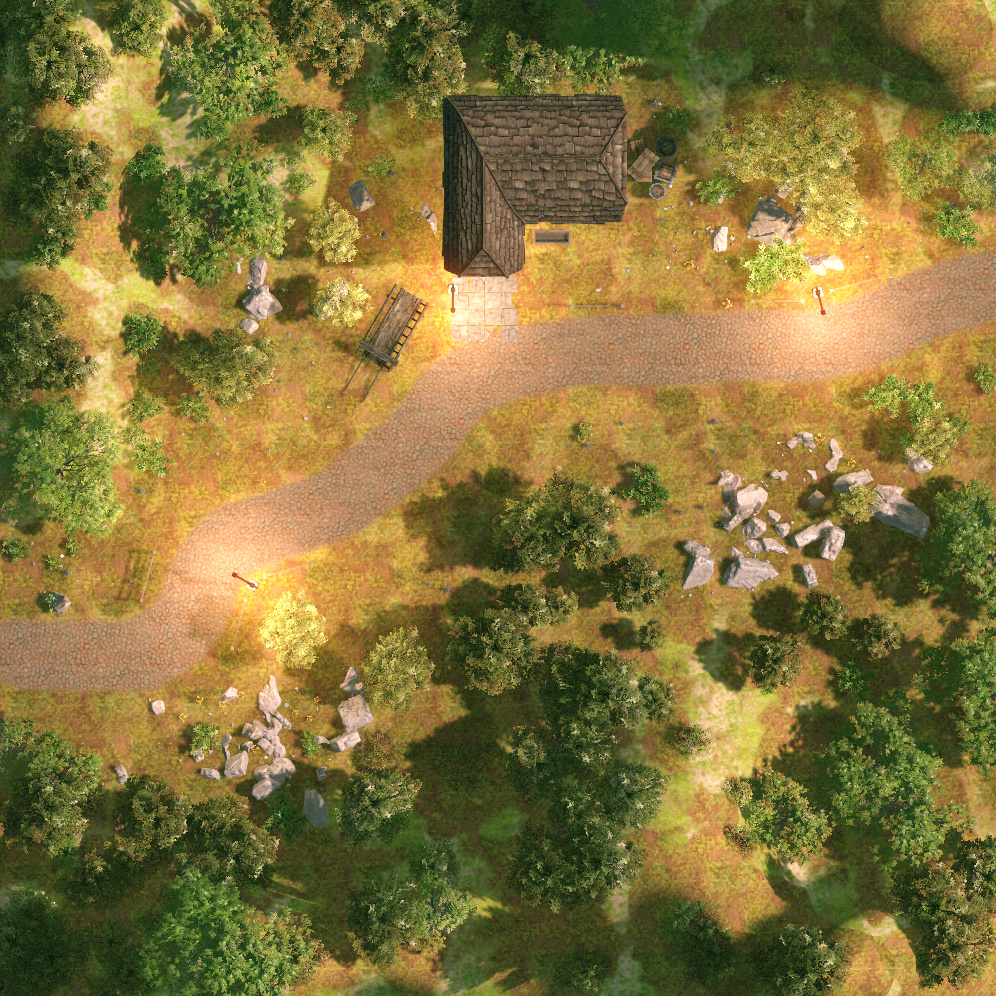
Using the Sculpt tool, we can add elevation changes. Typically this isn’t hugely noticeable from a birds eye view, but I like that it adds a bit of depth. After that I place key objects - in this case it’s really just the inn building. You can add more objects for detailing purposes in the next steps.
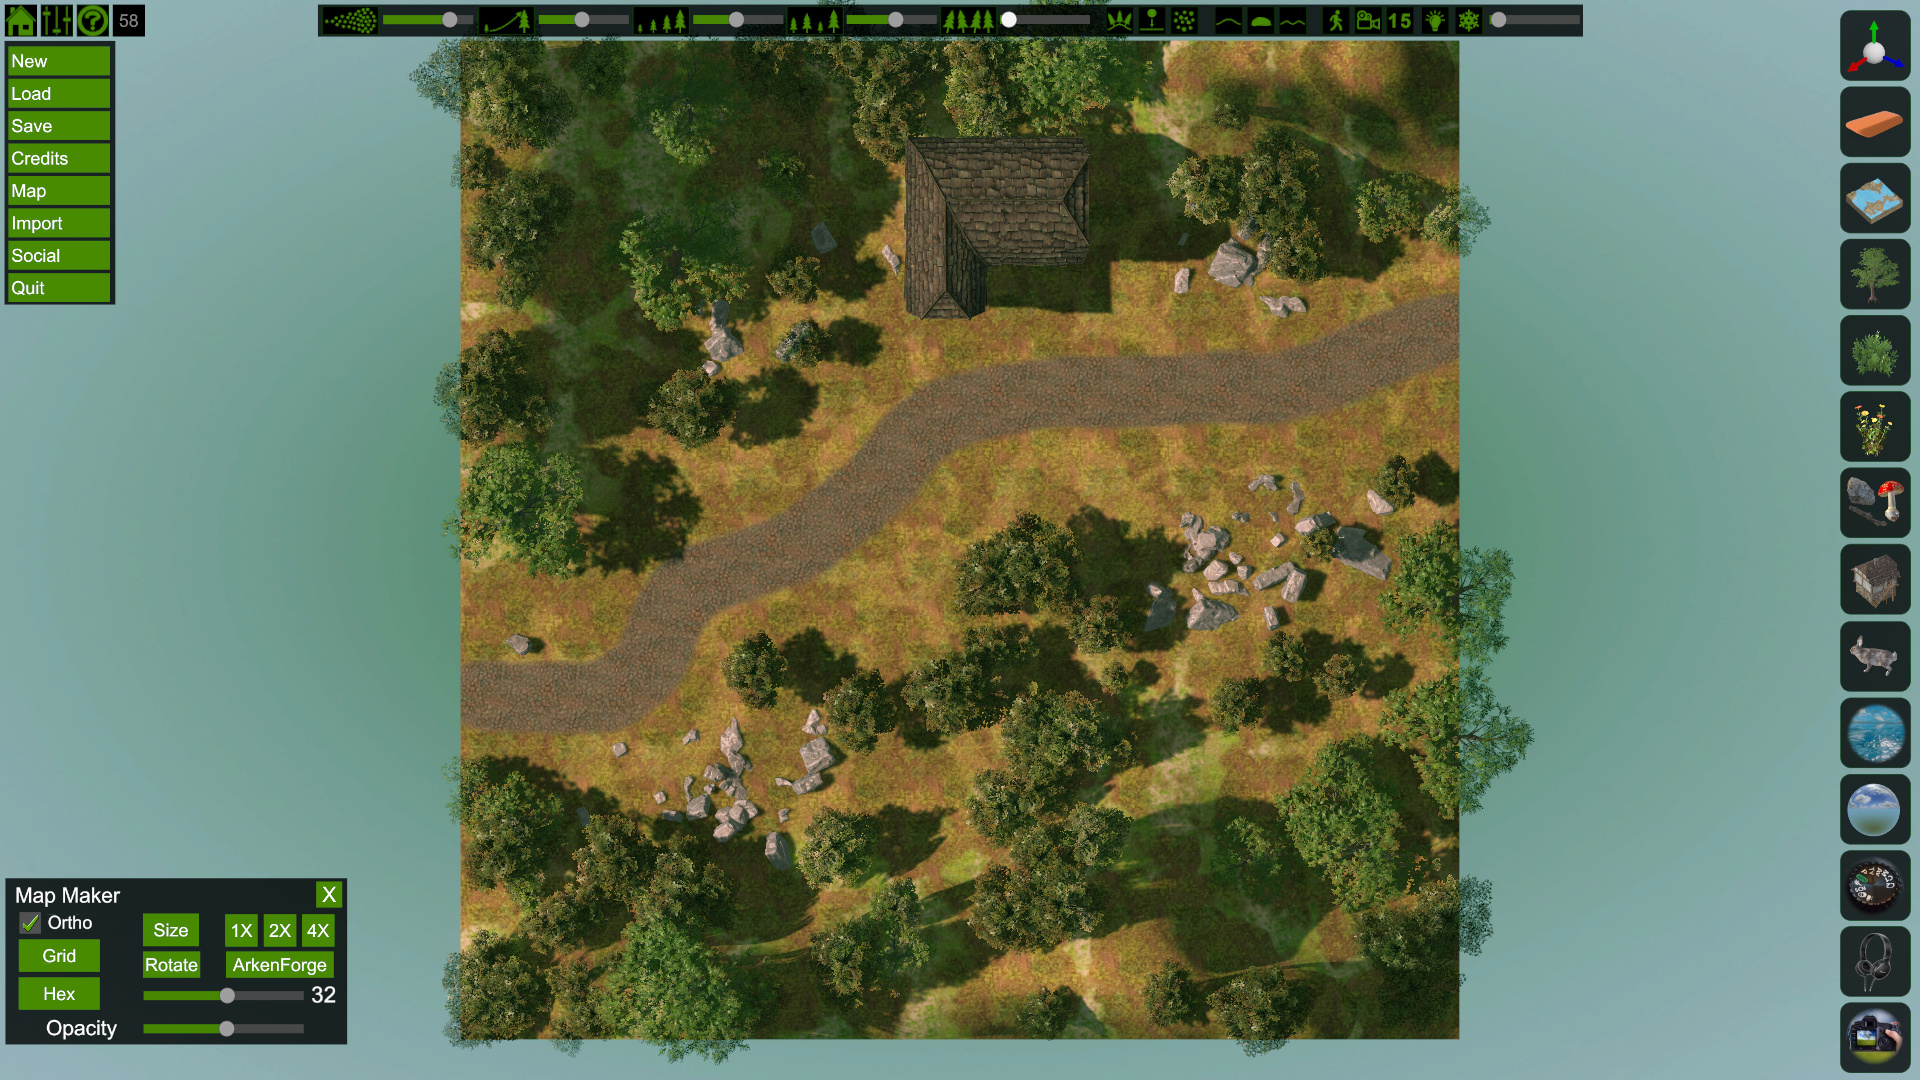
8. ADDING TREES & ROCKS
You can spend a lot of time in this step, along with the later detailing step, but since we’re going for speed, here’s what I did. Select a large tree, dot them around the outside of the map. Select a smaller tree, place thicker amounts around the outsides of the map. Select a rock, drop small “rock gardens”. I’ve turned off the grid here so you can see placement a bit more clearly.
9. DETAILING
This step can really be the most time consuming if you let it be. I personally try to crash through this as fast as possible but practice will definitely make the process quicker. Typically I go for less dominant natural objects first like some small shrubs, flowers, and smaller rocks. Then I move onto man made objects like fences, wagons, lamp posts, etc (I really try to keep the PC’s in mind here, what environmental objects can I place that might come into play during a combat encounter?). FS also has a lot of graphical settings you can mess with, for this example I bumped up the Exposure and used the Sun/Moon Direction Slider to adjust shadow direction.
10. EXPORTING
The final step! Typically, I’ll export a version with grids, and a version without. Using the Map window, select which size you’d like to export at (typically I use 1X). I’ll save the map, close FS, then I’ll usually throw the image into some graphic editing software (Photoshop, GIMP, even Microsoft Paint will work) and crop out the background.
(click here for higher resolutions)
That’s about it! Tried to boil it down as much as I could. I can definitely see how those that aren’t too familiar with software like this might not see how this is “quick” compared to other methods. For me, someone that’s grown up with sandbox type video games like Neverwinter Nights, games with level editors, and dabbled in game development, I find this method very quick and still quite fun! Give it a shot if you think it looks fun too.
I find these are really good for virtual table tops (I personally use Tabletop Simulator, might make a tutorial on how to use that next). They can also be used for tables that have build in flat screen displays, but I figure that’s a lot less common. Lemme know if you guys have any questions or if you end up making some cool maps - I’d love to see them! Anyway, happy map making! 
